
Why Is My AC Not Cooling Well? Common Causes
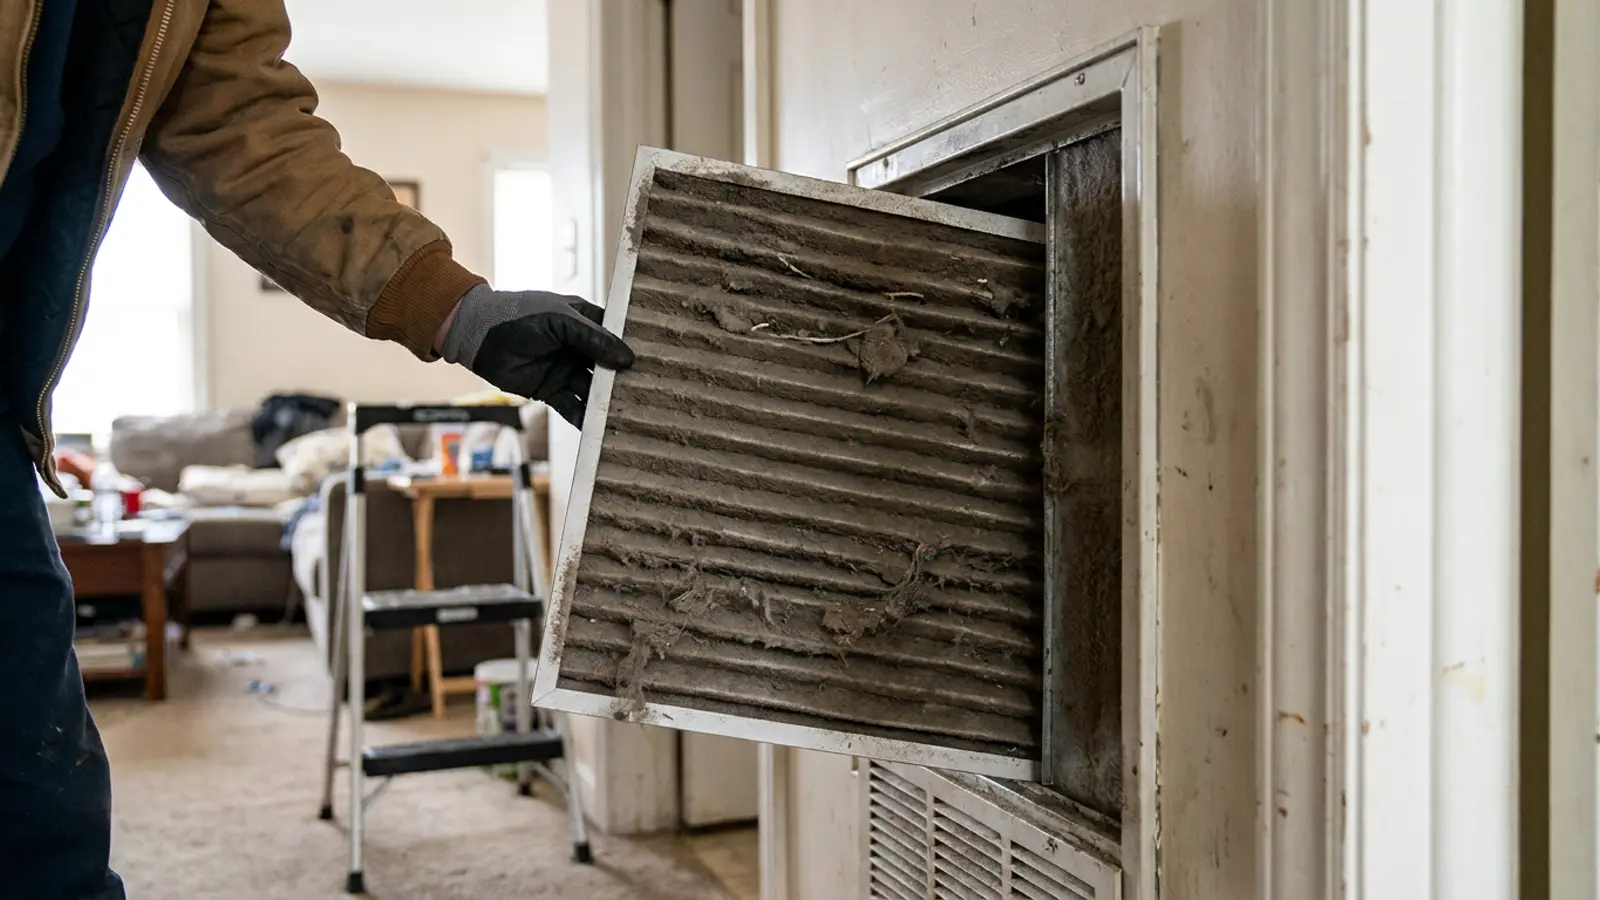
Causes, safe checks and when to call a professional
Expert Answer: AC Not Cooling Well? Common Causes
Partial cooling — the system works but the house feels warm and humid — almost always comes down to reduced capacity rather than a hard failure. In rough order of frequency: a dirty filter or restricted airflow, a dirty outdoor condenser coil, a slow refrigerant leak, duct leakage into unconditioned space, and a system that is simply undersized for a heat wave or for changes made to the home. None of these are emergencies, but a slow refrigerant leak will keep getting worse and is worth catching early.
Check these 3 things first
- 1Review filter condition and last change date.
- 2Inspect the outdoor coil for visible dirt or blockage.
- 3Note whether cooling has degraded gradually or suddenly.
How Serious Is This?
GREEN — this issue's severity level
Usually Manageable(this issue)
Often resolved with basic homeowner checks and routine maintenance.
YELLOW
Inspection Recommended
Worth a professional diagnosis soon to avoid a larger repair.
RED
Potentially Serious
Stop using the system and get professional help right away.
Most Likely Causes of an AC Not Cooling Well? Common Causes
1. Restricted airflow at the filter or coil
The single most common cause. A dirty filter or a dust-loaded evaporator coil reduces both capacity and dehumidification.
2. Dirty condenser coil
Rejecting heat becomes harder as the outdoor coil loads with dirt, and the loss is worst exactly when you need capacity most.
3. Slow refrigerant leak
A gradual decline in performance across one or two seasons is the classic pattern. Capacity drops before any obvious failure occurs.
4. Leaky or uninsulated ducts
Supply leaks dump cold air into an attic; return leaks pull hot attic air into the system. Both can consume a large share of capacity.
5. Dirty or failing blower
A dust-caked blower wheel or a weakening motor moves noticeably less air than rated.
6. Undersized equipment or increased load
Added square footage, more glazing, more occupants, or a very high outdoor temperature can push a correctly sized system past its limit.
7. Thermostat placement
A thermostat in direct sun or near a supply register reads the wrong temperature and cycles the system incorrectly.
Safe Homeowner Checks for an AC Not Cooling Well? Common Causes
- Replace the filter and note whether performance improves within a day.
- Hose off the outdoor coil fins gently from the outside in, with the power off at the disconnect.
- Walk the house and compare register airflow room by room.
- Check accessible ducts in the attic or basement for disconnected or crushed sections.
- Note whether the problem is worst in the afternoon or constant all day.
- Check indoor humidity — persistently over 60% suggests airflow or sizing problems.
Stop and get help if you notice
- • Performance that has degraded every summer for two or three years.
- • Ice appearing on the line set during hot weather.
- • Sharply rising electricity usage without a change in habits.
2-Minute Tests for an AC Not Cooling Well? Common Causes
Each test isolates one specific cause so you know what you are dealing with before anyone quotes you a repair. Stop immediately if anything feels unsafe.
Airflow restriction ranking check
About 5 minutesTools: None
Tests for: Restricted airflow at the filter or coil
- Check filter date and condition.
- Feel airflow strength at two or three registers.
- Note whether airflow feels weak system-wide or only in one room.
- Normal result
- Airflow feels strong and even at every checked register.
- Problem result
- Airflow feels weak at most or all registers.
What it means: A whole-house restriction such as a dirty filter is the most common cause of reduced cooling performance.
Outdoor coil airflow check
About 5 minutesTools: None
Tests for: Dirty condenser coil
- Inspect outdoor coil fins for dirt.
- Feel for warm air exiting the top of the unit while running.
- Compare unit performance in morning versus afternoon heat.
- Normal result
- Coil looks clean and performance stays consistent through the day.
- Problem result
- Coil is dirty and cooling noticeably worsens in the afternoon heat.
What it means: A dirty condenser loses heat-rejection capacity as outdoor temperature climbs.
Gradual capacity decline check
About 3 minutesTools: None
Tests for: Slow refrigerant leak
- Recall how cooling performance has changed over the past year.
- Check for any oily residue near refrigerant line fittings.
- Note any history of added refrigerant during past service visits.
- Normal result
- No history of refrigerant top-offs and no residue at fittings.
- Problem result
- Cooling has slowly weakened over months and a technician has added refrigerant before.
What it means: A slow leak steadily reduces charge and capacity over time.
Attic and crawlspace duct inspection
About 10 minutesTools: Flashlight
Tests for: Leaky or uninsulated ducts
- Visit the attic or crawlspace where ducts are visible.
- Look for disconnected joints or crushed sections.
- Feel for air leaking at connections while the system runs.
- Normal result
- Duct connections are sealed and insulation is intact.
- Problem result
- You feel air escaping at a joint or see a disconnected section.
What it means: Duct leakage sends cooled air into unconditioned space instead of the house.
Thermostat location review
About 2 minutesTools: None
Tests for: Thermostat placement
- Check whether the thermostat is near a supply vent, window, or heat source.
- Note if that room feels different in temperature from the rest of the house.
- Normal result
- Thermostat is on an interior wall away from vents and direct sun.
- Problem result
- Thermostat is near a vent, lamp, or window with direct sun exposure.
What it means: Poor thermostat placement can cause the system to shut off before the rest of the house is actually cool.
What Fixing an AC Not Cooling Well? Common Causes Typically Costs
Filter replacement
- DIY
- $15-$30
- Professional
- $40-$80
- Typical time
- 10 minutes
Condenser coil cleaning
- DIY
- $0 (hose rinse)
- Professional
- $100-$250
- Typical time
- 30-60 minutes
Refrigerant leak repair
- DIY
- Not a DIY repair
- Professional
- $300-$1,800+
- Typical time
- 2-6 hours
Duct sealing
- DIY
- $50-$150 (accessible)
- Professional
- $500-$2,500
- Typical time
- Half to full day
Thermostat relocation
- DIY
- $30-$80 (wire extension)
- Professional
- $150-$300
- Typical time
- 1-2 hours
| Problem | DIY cost | Professional cost | Typical time |
|---|---|---|---|
| Filter replacement | $15-$30 | $40-$80 | 10 minutes |
| Condenser coil cleaning | $0 (hose rinse) | $100-$250 | 30-60 minutes |
| Refrigerant leak repair | Not a DIY repair | $300-$1,800+ | 2-6 hours |
| Duct sealing | $50-$150 (accessible) | $500-$2,500 | Half to full day |
| Thermostat relocation | $30-$80 (wire extension) | $150-$300 | 1-2 hours |
Ranges are national estimates for planning only. Local labor rates, equipment access and parts availability change what you will actually be quoted.
Working Through an AC Not Cooling Well? Common Causes
Is cooling worse only during the hottest part of the day?
Yes: Capacity shortfall — check the condenser coil, charge and load.
No: Look at airflow and duct problems that affect the system all day.
Are some rooms fine while others stay warm?
Yes: Suspect duct design, leakage or balance rather than the equipment.
No: Treat it as a whole-system capacity issue.
Has performance declined gradually over seasons?
Yes: A slow refrigerant leak or accumulated coil fouling is likely — have it measured.
No: Look for a recent change: filter, blower, duct damage or added load.
What the technician will check
- Airflow measurement and total external static pressure.
- Superheat and subcooling to evaluate charge.
- Evaporator and condenser coil inspection.
- Blower wheel condition and motor amp draw.
- Duct leakage assessment and supply temperature at distant registers.
Repair considerations
- • Coil cleaning and duct sealing often restore significant capacity for modest cost.
- • Charge correction is only worthwhile alongside leak repair.
- • If the system is undersized for the home as it exists today, no repair will fix comfort — sizing has to be addressed.
What this actually means
Degraded cooling is a capacity story. The equipment is running and the controls are fine, but somewhere between the return grille and the outdoor coil the system is losing the ability to move heat. Each cause leaves fingerprints: humidity problems point at airflow and sizing, afternoon-only problems point at the condenser and charge, and room-to-room differences point at ducts.
When to Call an HVAC Professional About an AC Not Cooling Well? Common Causes
- Cleaning the filter and condenser makes no measurable difference.
- Humidity stays high even when the temperature is acceptable.
- You suspect the decline has continued across seasons.
- You want the refrigerant charge verified rather than guessed at.
Preventing an AC Not Cooling Well? Common Causes From Coming Back
- • Quarterly filter changes and an annual coil cleaning.
- • Seal and insulate attic ducts.
- • Shade the outdoor unit without blocking airflow.
- • Track your normal summer runtime so you notice degradation early.
Worth doing yourself
- • Replace the filter on a fixed 1-3 month schedule.
- • Rinse the outdoor coil each spring before peak season.
- • Seal accessible duct joints with mastic.
- • Relocate a thermostat away from vents and direct sunlight if feasible.
Do not waste money on
- • Do not oversize a replacement system hoping for more capacity — it often worsens humidity control.
- • Do not ignore a slow leak; small leaks eventually cause compressor damage.
Related Problems: AC Not Cooling Well? Common Causes
- YELLOW — Inspection RecommendedAC Not CoolingWhy Is My AC Not Cooling?Read this next if general residential AC cooling failure with no specific symptom named yet.View answer
- GREEN — Usually ManageableAC Operation ProblemsWhy Is My AC Not Keeping Up?Read this next if system cools but loses ground against peak load — the house drifts above setpoint during the hottest hours and recovers at night.View answer
- YELLOW — Inspection RecommendedAC Not CoolingWhy Is My AC Not Blowing Cold Air?Read this next if air is moving from the supply registers but it is not noticeably cold at the vent.View answer
- GREEN — Usually ManageableAC Operation ProblemsWhy Is My AC Running Constantly?Read this next if system never shuts off — visitor wants to know whether continuous runtime is normal and what drives it.View answer
- YELLOW — Inspection RecommendedAC Not CoolingWhy Is My AC Not Cold?Read this next if short, immediate phrasing — visitor wants the shortest possible explanation and the single most likely cause.View answer
- YELLOW — Inspection RecommendedAC Operation ProblemsWhy Is My AC Short Cycling?Read this next if compressor starts and stops after only a few minutes, repeatedly — a cycling behaviour problem rather than a temperature complaint.View answer
- All AC Not Cooling problemsBrowse category
Frequently Asked Questions About an AC Not Cooling Well? Common Causes
Guidance this page draws on
- ACCA — Ranked list of common residential cooling capacity losses.
- U.S. Department of Energy — Duct sealing and thermostat placement guidance.
- ENERGY STAR — Maintenance scheduling recommendations.