
Why Is My AC Not Cooling?
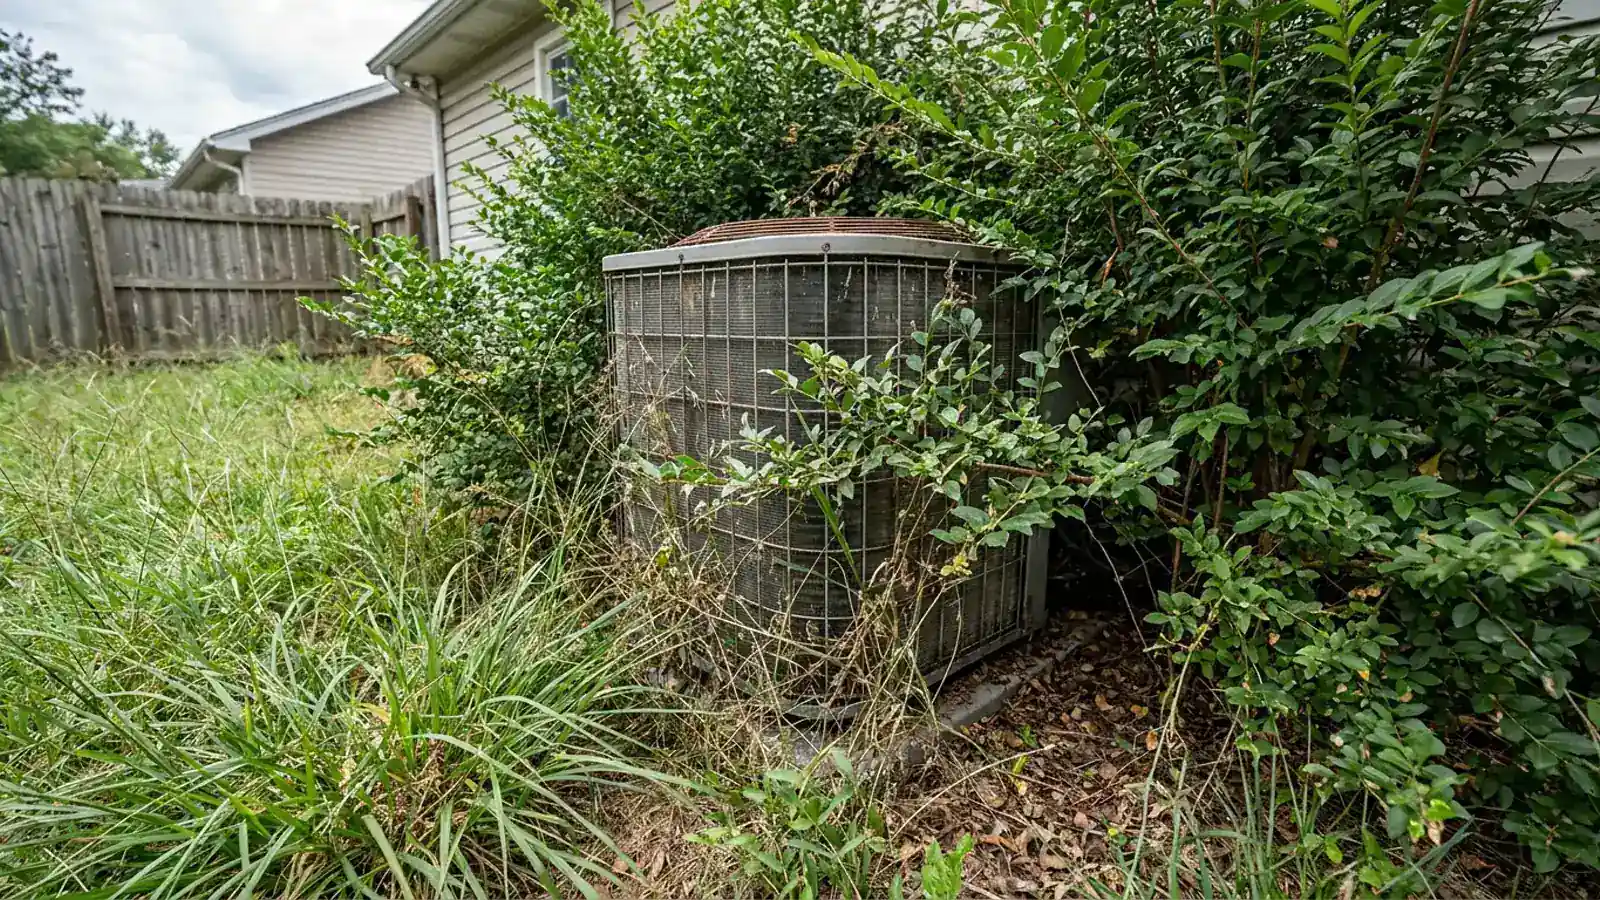
Causes, safe checks and when to call a professional
Expert Answer: AC Not Cooling
"Not cooling" is a broad symptom, so the fastest path is to sort it into one of three buckets: no air movement at all, air moving but not cold, or cold air that never brings the house down to setpoint. Check the thermostat, the filter and the outdoor unit in that order — those three account for the majority of calls. If air moves and the outdoor unit runs but the house still will not cool, the problem is usually refrigerant charge, a dirty condenser, or duct losses, and that needs measurement tools rather than guesswork.
Check these 3 things first
- 1Sort the symptom into no air, air but not cold, or cold air that never reaches setpoint.
- 2Confirm the thermostat has a valid cooling call and correct setpoint.
- 3Check the filter and the outdoor unit before assuming a major failure.
How Serious Is This?
GREEN
Usually Manageable
Often resolved with basic homeowner checks and routine maintenance.
YELLOW — this issue's severity level
Inspection Recommended(this issue)
Worth a professional diagnosis soon to avoid a larger repair.
RED
Potentially Serious
Stop using the system and get professional help right away.
Most Likely Causes of an AC Not Cooling
1. Thermostat problem or wrong settings
Dead batteries, a schedule holding a higher setpoint, or a failed thermostat means the equipment never receives a cooling call.
2. Restricted airflow
Clogged filter, closed registers, collapsed flex duct or a dirty blower wheel all reduce the amount of house air that can be cooled.
3. Dirty condenser coil
The outdoor coil must dump heat to the outside air. When it is blocked, head pressure climbs and capacity falls, especially in the afternoon.
4. Low refrigerant charge
A leak reduces the system's ability to absorb heat. Cooling gets progressively worse over weeks and often ends in coil icing.
5. Electrical failure at the outdoor unit
A failed capacitor, contactor or tripped breaker stops the compressor while the indoor blower keeps running.
6. Duct leakage and heat gain
Ducts in an attic can lose a substantial share of the cooling they carry, so the equipment works while rooms stay warm.
7. Undersized system or extreme heat load
During a heat wave, a system that is marginal for the house can run continuously and still lose ground.
Safe Homeowner Checks for an AC Not Cooling
- Set the thermostat to COOL, fan AUTO, and drop the setpoint 5°F.
- Replace or clean the air filter.
- Open all supply registers and confirm returns are unobstructed.
- Check that the outdoor unit is running and clear of debris.
- Look for ice on the copper lines entering the house.
- Check the breaker panel and the outdoor disconnect switch position.
- Note the indoor temperature over an hour to see whether the system holds or loses ground.
Stop and get help if you notice
- • Repeated breaker trips.
- • Hot electrical smell near the air handler or condenser.
- • Water pooling around the indoor unit while it struggles to cool.
2-Minute Tests for an AC Not Cooling
Each test isolates one specific cause so you know what you are dealing with before anyone quotes you a repair. Stop immediately if anything feels unsafe.
Cooling call verification
About 3 minutesTools: None
Tests for: Thermostat problem or wrong settings
- Set mode to COOL and setpoint 5°F below room temperature.
- Replace thermostat batteries if applicable.
- Watch for a cooling indicator or listen for equipment starting.
- Normal result
- The system responds within 1-2 minutes with the outdoor unit starting.
- Problem result
- No response from either indoor or outdoor equipment.
What it means: The thermostat or its wiring is not delivering a valid call to the equipment.
Return air and filter inspection
About 5 minutesTools: None
Tests for: Restricted airflow
- Inspect the filter for buildup.
- Confirm return grilles are not blocked by furniture or rugs.
- Open any supply registers that were closed.
- Normal result
- Filter is clean and all returns and supplies are unobstructed.
- Problem result
- Filter is clogged or a return grille is blocked.
What it means: Restricted airflow across the coil reduces cooling capacity throughout the house.
Outdoor coil visual inspection
About 5 minutesTools: Flashlight
Tests for: Dirty condenser coil
- Walk around the outdoor unit.
- Look through the fins for dirt, grass or cottonwood buildup.
- Check clearance around the unit.
- Normal result
- Fins are visibly clean and airflow through them is unobstructed.
- Problem result
- Fins are caked with debris or vegetation is pressed against the cabinet.
What it means: A dirty condenser coil cannot reject heat efficiently, cutting cooling capacity on hot days.
Outdoor unit power and sound check
About 3 minutesTools: None
Tests for: Electrical failure at the outdoor unit
- Check the breaker panel for a tripped double-pole breaker.
- Listen at the outdoor unit for a hum with no fan movement.
- Reset the breaker once if tripped.
- Normal result
- Breaker is on and the unit runs normally after reset.
- Problem result
- Breaker trips again immediately, or the unit hums without spinning.
What it means: An electrical component such as a capacitor or contactor has likely failed.
What Fixing an AC Not Cooling Typically Costs
Thermostat battery or setting fix
- DIY
- $0-$10
- Professional
- N/A
- Typical time
- 5 minutes
Filter replacement
- DIY
- $15-$30
- Professional
- $40-$80
- Typical time
- 10 minutes
Capacitor/contactor repair
- DIY
- Not a DIY repair
- Professional
- $150-$400
- Typical time
- 1 hour
Condenser coil cleaning
- DIY
- $0 (hose rinse)
- Professional
- $100-$250
- Typical time
- 30-60 minutes
Refrigerant charge diagnosis and repair
- DIY
- Not a DIY repair
- Professional
- $300-$1,800+
- Typical time
- 2-6 hours
| Problem | DIY cost | Professional cost | Typical time |
|---|---|---|---|
| Thermostat battery or setting fix | $0-$10 | N/A | 5 minutes |
| Filter replacement | $15-$30 | $40-$80 | 10 minutes |
| Capacitor/contactor repair | Not a DIY repair | $150-$400 | 1 hour |
| Condenser coil cleaning | $0 (hose rinse) | $100-$250 | 30-60 minutes |
| Refrigerant charge diagnosis and repair | Not a DIY repair | $300-$1,800+ | 2-6 hours |
Ranges are national estimates for planning only. Local labor rates, equipment access and parts availability change what you will actually be quoted.
Working Through an AC Not Cooling
Is any air coming out of the vents?
Yes: Continue — the blower is running.
No: Check the filter, breaker and air handler power. This is an airflow or power problem.
Is that air noticeably cool?
Yes: The refrigeration cycle works; the issue is capacity, duct loss or heat load.
No: Focus on the outdoor unit, refrigerant charge and coil condition.
Is the outdoor unit running whenever the thermostat calls?
Yes: Have charge and coil cleanliness evaluated.
No: Suspect capacitor, contactor, control board or a safety lockout.
Does the house cool at night but not in the afternoon?
Yes: That is a capacity shortfall — dirty condenser, low charge, duct loss or sizing.
No: Treat it as a component failure rather than a capacity issue.
What the technician will check
- Temperature split and system airflow measurement.
- Refrigerant pressures with superheat and subcooling calculations.
- Condenser and evaporator coil inspection.
- Electrical component testing including capacitor microfarads and amp draw.
- Thermostat and control circuit verification.
- Duct static pressure and leakage assessment when capacity looks low but the equipment tests fine.
Repair considerations
- • Component-level failures (capacitor, contactor, thermostat) are typically minor repairs.
- • Coil replacement and compressor replacement are major repairs where system age matters.
- • Refrigerant type affects cost; phased-out refrigerants can make repairs uneconomical.
- • If the system is over about 15 years old and needs a sealed-system repair, price replacement alongside the repair.
What this actually means
Cooling depends on three systems working together: controls telling the equipment to run, airflow moving house air across a cold coil, and a refrigeration circuit rejecting that heat outdoors. Identifying which of the three has failed is more useful than guessing at parts, because each failure mode has a different set of causes and a different urgency.
When to Call an HVAC Professional About an AC Not Cooling
- Basic checks are done and the house still will not reach setpoint.
- The outdoor unit will not run or shuts off within minutes.
- You find ice anywhere on the system.
- Cooling has been getting slowly worse over several weeks — a classic slow leak pattern.
Preventing an AC Not Cooling From Coming Back
- • Annual professional cooling maintenance before the season.
- • Filter changes on a calendar reminder.
- • Keep the condenser clean and clear.
- • Address small comfort complaints early — they are often the first sign of a slow refrigerant leak.
Worth doing yourself
- • Replace batteries and confirm thermostat settings.
- • Replace a clogged filter and open blocked registers.
- • Rinse the outdoor coil with a garden hose.
- • Clear debris and vegetation from around the condenser.
- • Reset a tripped breaker one time only.
Do not waste money on
- • Do not keep resetting a breaker that trips repeatedly.
- • Do not assume the compressor is bad before a technician measures pressures.
- • Do not add refrigerant without a proper leak search.
Related Problems: AC Not Cooling
- YELLOW — Inspection RecommendedAC Not CoolingWhy Is My AC Not Blowing Cold Air?Read this next if air is moving from the supply registers but it is not noticeably cold at the vent.View answer
- GREEN — Usually ManageableAC Not CoolingWhy Is My AC Not Cooling Well? Common CausesRead this next if system still cools but performance has degraded; visitor wants a ranked list of the usual causes rather than a live troubleshooting session.View answer
- YELLOW — Inspection RecommendedAC Operation ProblemsWhy Is My AC Running But Not Cooling?Read this next if system operates continuously but conditioned air does not reduce indoor temperature — runtime is normal, results are not.View answer
- YELLOW — Inspection RecommendedAC Not CoolingWhy Is My AC Not Cooling But Fan Is Running?Read this next if indoor blower operates normally but the refrigeration cycle may not be operating — visitor has already isolated the fan as working.View answer
- GREEN — Usually ManageableAC Operation ProblemsWhy Is My AC Not Keeping Up?Read this next if system cools but loses ground against peak load — the house drifts above setpoint during the hottest hours and recovers at night.View answer
- YELLOW — Inspection RecommendedAC FreezingWhy Is My AC Freezing Up?Read this next if ice is actively forming during operation and the visitor wants the mechanism plus the immediate corrective action.View answer
- All AC Not Cooling problemsBrowse category
Frequently Asked Questions About an AC Not Cooling
Guidance this page draws on
- ACCA — Structured residential cooling-failure diagnostic sequence.
- ENERGY STAR — Filter and maintenance interval recommendations.
- U.S. EPA — Refrigerant leak repair and handling requirements.