
Why Is My AC Leaking Water?
Causes, safe checks and when to call a professional
Expert Answer: AC Leaking Water
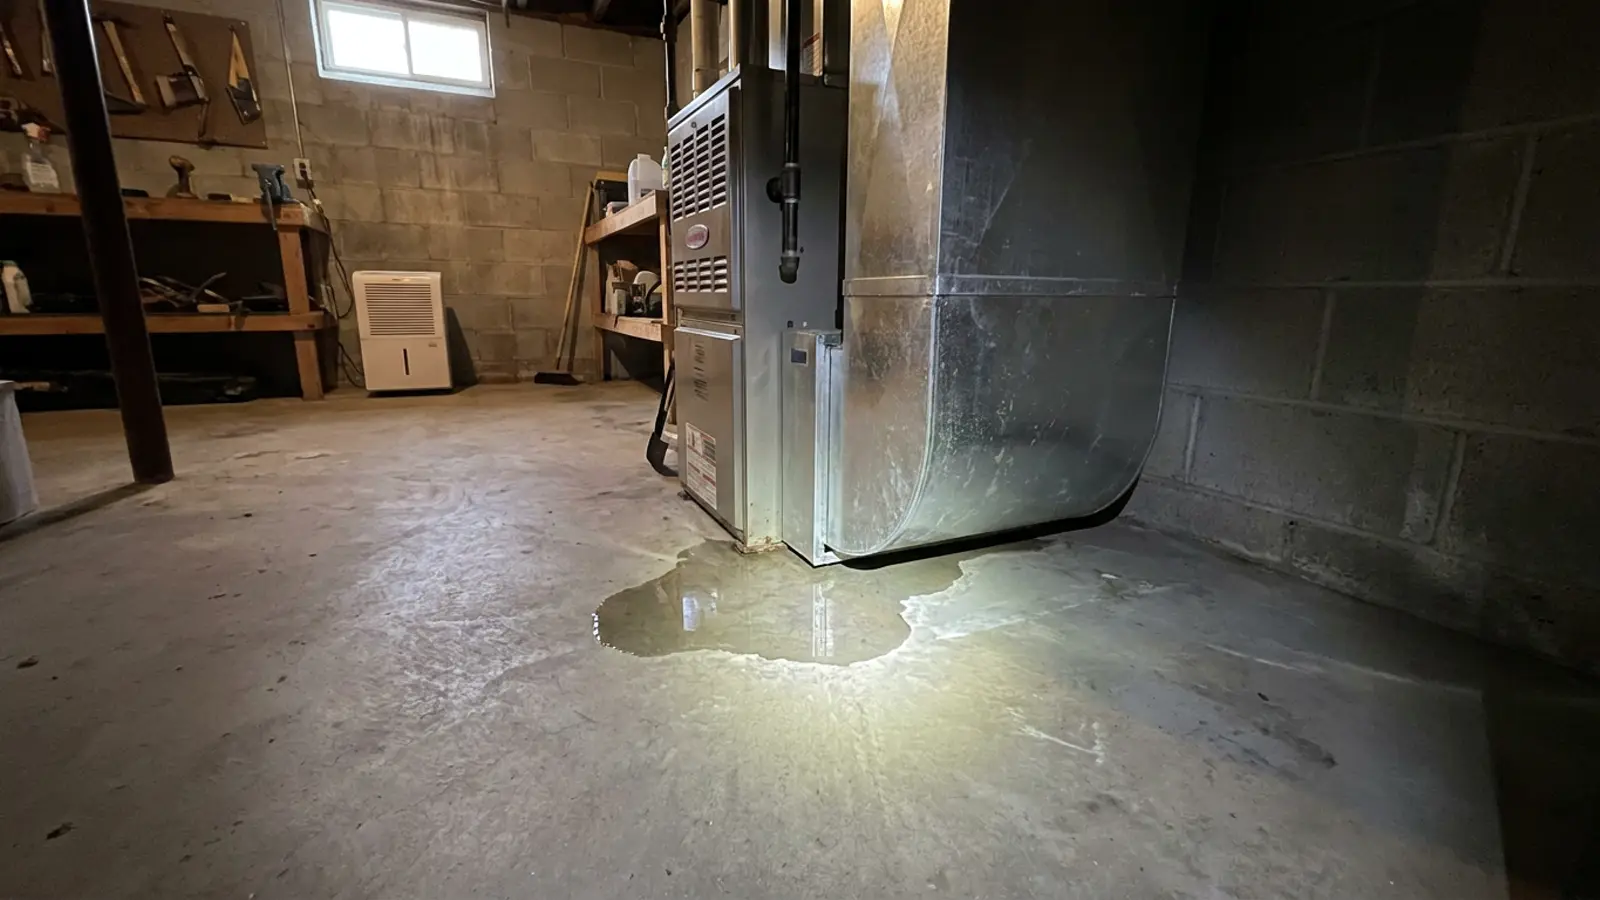
Almost every AC water leak is condensate — the moisture your system pulls out of indoor air — escaping instead of draining. The most common cause by far is a clogged condensate drain line, followed by a rusted or misaligned drain pan, a frozen coil that is thawing, a disconnected drain fitting, and a failed condensate pump. Water near the indoor unit deserves prompt attention because it can damage ceilings and flooring quickly. If your system has a shut-off float switch and it has tripped, that is the system protecting your home — do not bypass it.
Check these 3 things first
- 1Find the drain line's outdoor exit point and see if it is dripping normally.
- 2Look inside the cabinet for a full or overflowing drain pan.
- 3Check the air filter and coil for ice before you touch anything else.
How Serious Is This?
GREEN
Usually Manageable
Often resolved with basic homeowner checks and routine maintenance.
YELLOW — this issue's severity level
Inspection Recommended(this issue)
Worth a professional diagnosis soon to avoid a larger repair.
RED
Potentially Serious
Stop using the system and get professional help right away.
Most Likely Causes of an AC Leaking Water
1. Clogged condensate drain line
Algae and biofilm build up in the PVC drain and back the pan up. This is the single most common cause of AC water leaks.
2. Full or overflowing drain pan
A blocked drain, a rusted-through pan, or a pan installed out of level all let water spill over the edge.
3. Frozen evaporator coil thawing
Ice releases far more water at once than the drain can handle, causing overflow that looks like a plumbing leak.
4. Disconnected drain fitting or cracked pan
A drain that has separated from the pan dumps condensate directly into the cabinet or ceiling.
5. Failed condensate pump
Systems in basements or attics without gravity drainage rely on a pump; when it fails, the pan overflows.
6. Dirty air filter causing coil icing
The airflow restriction leads to icing, and the resulting thaw produces the leak — the filter is the root cause.
7. Poor duct or coil insulation causing condensation
Bare cold surfaces in a humid space sweat and drip, which can be mistaken for a drain leak.
Safe Homeowner Checks for an AC Leaking Water
- Locate where the water actually appears — indoor unit, ceiling, floor, or outside near the condenser.
- Look for standing water in the condensate drain pan.
- Check whether the drain line outlet outside is dripping during operation (it should be, in humid weather).
- Inspect the visible drain line for an obvious disconnect.
- Check the air filter and look for ice on the coil.
- If there is a condensate pump, check whether it is running and whether its reservoir is full.
- Shut cooling off if water is actively reaching drywall or flooring.
Stop and get help if you notice
- • Water staining or bulging on a ceiling below an attic air handler.
- • Water near electrical components.
- • Persistent musty odor, which can indicate ongoing moisture.
2-Minute Tests for an AC Leaking Water
Each test isolates one specific cause so you know what you are dealing with before anyone quotes you a repair. Stop immediately if anything feels unsafe.
Test the drain line for flow
About 10 minutesTools: Flashlight, wet/dry vacuum (optional)
Tests for: Clogged condensate drain line
- Find the PVC drain line exit point outside near the condenser or foundation.
- Run the AC for 10-15 minutes and watch that outlet.
- Pour a cup of water into the drain access tee near the indoor unit if one exists.
- Watch whether the water exits outside within a minute or backs up.
- Normal result
- Water poured in reaches the outdoor outlet within a minute.
- Problem result
- Water backs up, gurgles, or does not exit outside at all.
What it means: A slow or absent exit confirms a biofilm clog in the drain line.
Inspect the primary drain pan
About 5 minutesTools: Flashlight
Tests for: Full or overflowing drain pan
- Turn off the system at the thermostat.
- Open the access panel nearest the indoor coil.
- Look at the pan beneath the coil for standing water or overflow marks.
- Check the pan edges and corners for rust or cracks.
- Normal result
- The pan is dry or has only a shallow, draining film of water.
- Problem result
- Water sits above the drain fitting or spills over an edge.
What it means: Standing water means the drain path downstream is blocked or the pan itself is compromised.
Check the coil and filter for ice
About 5 minutesTools: Flashlight
Tests for: Frozen evaporator coil thawing
- Turn the system off and remove the filter.
- Shine a light on the visible coil surface through the access panel.
- Look for frost or solid ice on the coil fins or refrigerant lines.
- Note whether airflow at the return grille feels weak.
- Normal result
- No ice is visible and airflow feels strong.
- Problem result
- Frost, ice, or noticeably weak airflow is present.
What it means: Ice indicates the leak is meltwater, not a plain drainage clog, and the freezing cause needs fixing too.
Check condensate pump operation
About 10 minutesTools: Cup of water
Tests for: Failed condensate pump
- Locate the small condensate pump reservoir near the indoor unit.
- Check whether the reservoir has standing water in it.
- Pour a cup of water into the reservoir.
- Listen and watch for the pump to activate and clear the water.
- Normal result
- The pump kicks on within seconds and empties the reservoir.
- Problem result
- The pump stays silent or runs without moving water out.
What it means: A pump that will not cycle or move water has failed and needs replacement.
What Fixing an AC Leaking Water Typically Costs
Drain line clearing/flush
- DIY
- $5-$15 (vinegar or wet/dry vac)
- Professional
- $75-$200
- Typical time
- 30-60 minutes
Condensate pump replacement
- DIY
- Not recommended (wiring involved)
- Professional
- $150-$400
- Typical time
- 1 hour
Drain pan replacement
- DIY
- Not a DIY repair
- Professional
- $300-$800
- Typical time
- 2-4 hours
Coil deicing and airflow fix
- DIY
- $0 (new filter)
- Professional
- $150-$450
- Typical time
- 1-2 hours
Water damage drying/repair
- DIY
- Not a DIY repair
- Professional
- $300-$3,000+
- Typical time
- Varies
| Problem | DIY cost | Professional cost | Typical time |
|---|---|---|---|
| Drain line clearing/flush | $5-$15 (vinegar or wet/dry vac) | $75-$200 | 30-60 minutes |
| Condensate pump replacement | Not recommended (wiring involved) | $150-$400 | 1 hour |
| Drain pan replacement | Not a DIY repair | $300-$800 | 2-4 hours |
| Coil deicing and airflow fix | $0 (new filter) | $150-$450 | 1-2 hours |
| Water damage drying/repair | Not a DIY repair | $300-$3,000+ | Varies |
Ranges are national estimates for planning only. Local labor rates, equipment access and parts availability change what you will actually be quoted.
Working Through an AC Leaking Water
Is the water at the indoor unit or on a ceiling below it?
Yes: Treat as a condensate drainage problem and shut cooling off to limit damage.
No: Water at the outdoor unit is often normal condensation or rain — see below.
Is the drain pan holding standing water?
Yes: The drain line is blocked or the pump has failed.
No: Look for a cracked pan, a disconnected fitting or condensation on uninsulated surfaces.
Is there ice on the coil or lines?
Yes: The leak is thaw water. Address the freezing cause, not just the water.
No: Focus on the drainage path.
What the technician will check
- Clears and flushes the condensate drain line.
- Inspects the pan, float switch and trap for correct configuration.
- Tests the condensate pump.
- Checks coil cleanliness and airflow if icing is involved.
- Verifies drain slope and secondary drain arrangements.
Repair considerations
- • Drain clearing is a routine, low-cost service.
- • Pan replacement can require significant labor because the coil often has to be removed.
- • Water damage repair is usually a separate trade and cost.
- • If icing is the cause, the underlying airflow or refrigerant repair drives the total cost.
What this actually means
A cooling system removes several gallons of moisture per day in humid weather. That water is supposed to run off the evaporator coil into a pan and out through a drain line. Any interruption in that path — blockage, slope, corrosion, or pump failure — sends the water somewhere else. Understanding the drainage path is what makes locating the leak straightforward.
When to Call an HVAC Professional About an AC Leaking Water
- The drain line is blocked and you cannot clear it safely.
- The pan is rusted through or cracked.
- The condensate pump has failed.
- Water has reached ceilings, walls, flooring or electrical components.
- The coil is freezing repeatedly.
Preventing an AC Leaking Water From Coming Back
- • Have the condensate line flushed during annual maintenance.
- • Keep filters clean so the coil never ices.
- • Ask your technician about a float safety switch if you do not have one.
- • Check the pan visually a couple of times each summer.
Worth doing yourself
- • Replace a dirty filter to restore airflow and stop icing.
- • Flush the drain line with a cup of distilled vinegar monthly during cooling season.
- • Clear a visible drain-line clog with a wet/dry vacuum at the outdoor outlet.
- • Wipe out and inspect the pan for early rust.
- • Confirm the drain line has continuous downward slope where accessible.
Do not waste money on
- • Pouring bleach into drain lines with metal or rubber fittings it can degrade.
- • Running the system repeatedly hoping the leak stops on its own.
- • Sealing a cracked pan with tape or caulk as a long-term fix.
Related Problems: AC Leaking Water
- YELLOW — Inspection RecommendedAC Water LeaksWhy Is My AC Unit Leaking Water?Read this next if water is visibly originating at the equipment cabinet — indoor air handler or outdoor condenser — rather than appearing elsewhere in the home.View answer
- YELLOW — Inspection RecommendedAC Water LeaksWhy Is My AC Leaking?Read this next if leak type is unidentified — the visitor has not established whether it is water, refrigerant or oil, so the page must help classify the leak.View answer
- YELLOW — Inspection RecommendedAC Water LeaksWhy Is My AC Dripping Water?Read this next if active, ongoing dripping observed in real time — emphasis on the drip location and whether that specific drip is normal.View answer
- YELLOW — Inspection RecommendedAC Water LeaksWhy Is My AC Leaking Water Inside?Read this next if water is appearing indoors and the visitor is concerned about interior damage — emphasis on containment and stopping the water.View answer
- YELLOW — Inspection RecommendedAC Water LeaksWhy Is My AC Leaking Water From the Bottom?Read this next if water is emerging specifically at the base of the unit — drain pan, cabinet base and overflow path are the focus.View answer
- YELLOW — Inspection RecommendedAC FreezingWhy Is My AC Freezing Up?Read this next if ice is actively forming during operation and the visitor wants the mechanism plus the immediate corrective action.View answer
- All AC Water Leaks problemsBrowse category
Frequently Asked Questions About an AC Leaking Water
Guidance this page draws on
- U.S. Department of Energy — Guidance on cooling system moisture removal and maintenance.
- ACCA — Residential HVAC installation and condensate drainage practices.
- HVAC manufacturer service literature — Condensate pump and drain pan service procedures.