
Why Is My AC Dripping Water?
Causes, safe checks and when to call a professional
Expert Answer: AC Dripping Water
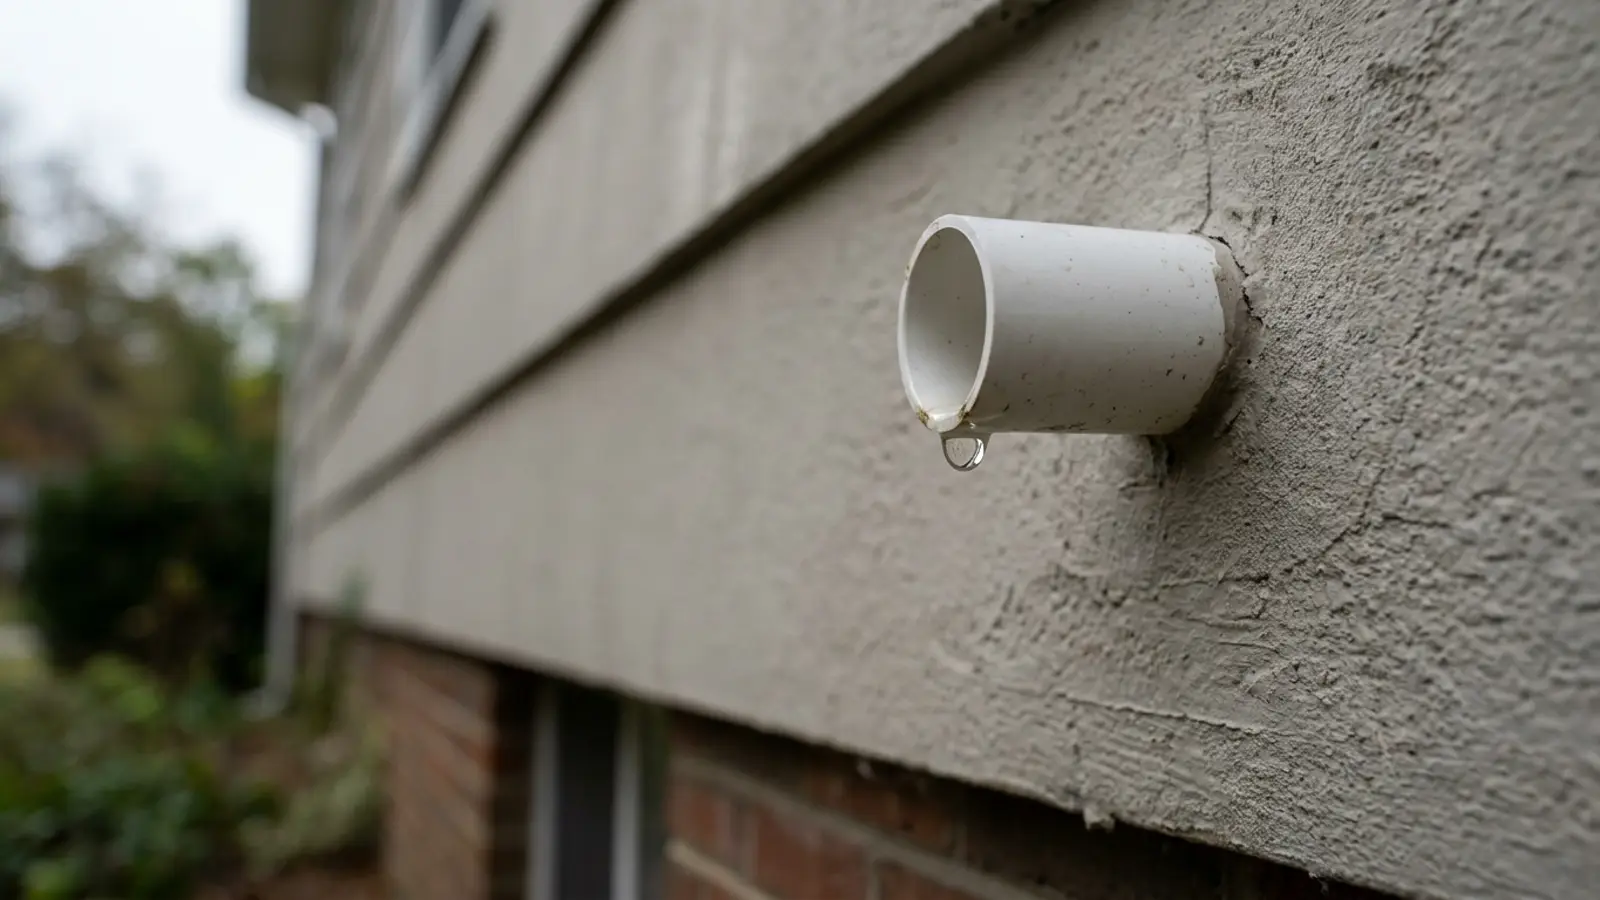
Not all dripping is a problem. A steady drip from the condensate line outside is exactly what a working system should do in humid weather, and dripping from the outdoor unit's cold lines is normal condensation. Dripping from the indoor cabinet, from a ceiling, from a vent, or anywhere inside living space is not normal and means condensate is escaping the drainage path. Locate the drip point precisely — that single observation identifies the cause faster than anything else.
Check these 3 things first
- 1Note exactly where the drip appears and whether it is slow or steady.
- 2Check the drain pan for a slope problem or rust pinhole.
- 3Confirm whether the drip is outdoors (often normal) or indoors (not normal).
How Serious Is This?
GREEN
Usually Manageable
Often resolved with basic homeowner checks and routine maintenance.
YELLOW — this issue's severity level
Inspection Recommended(this issue)
Worth a professional diagnosis soon to avoid a larger repair.
RED
Potentially Serious
Stop using the system and get professional help right away.
Most Likely Causes of an AC Dripping Water
1. Normal condensate discharge outdoors
The drain line terminates outside and should drip steadily during humid cooling weather.
2. Partially clogged drain line
A partial blockage lets some water through while the rest backs up and drips from the pan edge or cabinet seam.
3. Condensation on uninsulated lines or ducts
Missing or deteriorated insulation on the suction line or duct in a humid space creates surface condensation that drips.
4. Loose or missing drain trap
Improper trapping lets the blower pull or push water out of the pan.
5. Coil sweating and blow-off
Water carried off the coil face by airflow drips into the duct or cabinet base.
6. Slow thaw of a lightly iced coil
A mild icing episode produces intermittent dripping as it melts.
Safe Homeowner Checks for an AC Dripping Water
- Identify precisely where the drip originates.
- Confirm whether the outdoor drain line is discharging — a dry line during humid operation suggests a clog.
- Feel the suction line insulation; missing or soggy insulation causes sweating.
- Check the pan for standing water.
- Place a container under the drip to gauge the rate.
- Replace a dirty filter and inspect for coil frost.
Stop and get help if you notice
- • Dripping onto electrical components or through a ceiling.
- • Dripping that gets steadily faster.
- • Musty smell suggesting long-term moisture.
2-Minute Tests for an AC Dripping Water
Each test isolates one specific cause so you know what you are dealing with before anyone quotes you a repair. Stop immediately if anything feels unsafe.
Confirm the outdoor drip is expected
About 5 minutesTools: None
Tests for: Normal condensate discharge outdoors
- Locate the drain line's outdoor termination point.
- Run the AC for 10 minutes on a humid day.
- Watch for a slow, steady drip from that specific outlet only.
- Confirm no water is appearing anywhere indoors.
- Normal result
- A slow, clear drip only from the designated outdoor outlet.
- Problem result
- Dripping from unexpected spots or any indoor location.
What it means: A single steady outdoor drip is the drainage system working correctly.
Check drip rate against clog symptoms
About 10 minutesTools: Flashlight
Tests for: Partially clogged drain line
- Watch the outdoor drip rate over several minutes.
- Open the indoor access panel and check pan water depth.
- Compare: a very slow outdoor drip with a rising indoor pan suggests partial blockage.
- Try clearing the line at the outdoor end with a wet/dry vacuum if accessible.
- Normal result
- Drip rate is steady and the pan stays shallow.
- Problem result
- Drip is nearly absent while the indoor pan level climbs.
What it means: A near-stopped drip with a filling pan means the line is partially clogged, not fully open.
Check for sweating away from the drain path
About 10 minutesTools: Flashlight
Tests for: Condensation on uninsulated lines or ducts
- Trace the drip location back to see if it aligns with the drain line at all.
- Feel nearby refrigerant lines or ducts for a cold, wet surface.
- Check for missing or compressed foam insulation on the suction line.
- Note the humidity level in that space.
- Normal result
- Lines and ducts are dry and insulated where visible.
- Problem result
- Bare or thin insulation is present on a cold, wet surface.
What it means: Drips from bare cold lines are condensation, not a drain failure, and need insulation.
Inspect the drain trap fitting
About 10 minutesTools: Flashlight
Tests for: Loose or missing drain trap
- Locate the P-trap style fitting near the drain pan outlet if your system has one.
- Check whether it is present, tight, and filled with water.
- Look for drips specifically at that joint.
- Confirm the trap is oriented correctly per the visible flow direction.
- Normal result
- The trap is intact, tight, and holding water with no drips.
- Problem result
- The trap is missing, loose, or dripping at the joint.
What it means: A missing or leaking trap disrupts proper drainage and lets air interfere with flow.
What Fixing an AC Dripping Water Typically Costs
Drain line flush/clearing
- DIY
- $5-$15
- Professional
- $75-$200
- Typical time
- 30-60 minutes
Drain pan re-leveling or shimming
- DIY
- $0-$20
- Professional
- $100-$250
- Typical time
- 1 hour
Trap replacement/installation
- DIY
- Not recommended
- Professional
- $75-$200
- Typical time
- 30-60 minutes
Line/duct insulation repair
- DIY
- $20-$60
- Professional
- $150-$400
- Typical time
- 1-2 hours
Drain pan replacement (rust-through)
- DIY
- Not a DIY repair
- Professional
- $300-$800
- Typical time
- 2-4 hours
| Problem | DIY cost | Professional cost | Typical time |
|---|---|---|---|
| Drain line flush/clearing | $5-$15 | $75-$200 | 30-60 minutes |
| Drain pan re-leveling or shimming | $0-$20 | $100-$250 | 1 hour |
| Trap replacement/installation | Not recommended | $75-$200 | 30-60 minutes |
| Line/duct insulation repair | $20-$60 | $150-$400 | 1-2 hours |
| Drain pan replacement (rust-through) | Not a DIY repair | $300-$800 | 2-4 hours |
Ranges are national estimates for planning only. Local labor rates, equipment access and parts availability change what you will actually be quoted.
Working Through an AC Dripping Water
Is the drip outdoors at the end of the condensate line?
Yes: Normal operation. Nothing to fix.
No: Continue.
Is the drip coming from bare, cold pipe or duct?
Yes: Condensation from missing insulation — replaceable insulation solves it.
No: Continue.
Is water standing in the drain pan?
Yes: Partial or full drain blockage — have it cleared.
No: Look for a coil blow-off or an unsealed cabinet seam.
What the technician will check
- Drain line clearing and trap correction.
- Insulation inspection on the suction line and coil cabinet.
- Pan level and condition.
- Airflow evaluation for coil blow-off.
Repair considerations
- • Insulation replacement is inexpensive.
- • Drain clearing is routine service.
- • Cabinet or coil re-sealing may involve more labor.
What this actually means
A drip is a slow, continuous escape rather than a sudden flood, which usually points to a partial blockage, a small gap, or condensation forming on a cold surface. The drip rate and location distinguish an overflowing pan from a sweating duct from normal outdoor discharge.
When to Call an HVAC Professional About an AC Dripping Water
- The drain line is dry outside while the pan holds water.
- Dripping enters living space or contacts electrical parts.
- You cannot locate the drip source.
- The drip follows an icing episode.
Preventing an AC Dripping Water From Coming Back
- • Keep the drain line clear with annual flushing.
- • Maintain suction line insulation, especially where it is exposed to sun.
- • Control indoor humidity so cold surfaces sweat less.
Worth doing yourself
- • Confirm the outdoor drip is normal before assuming a problem exists.
- • Wrap accessible bare refrigerant lines with foam pipe insulation.
- • Flush the drain line periodically to prevent slow buildup.
- • Check that the indoor unit and pan sit level, not tilted away from the drain.
Do not waste money on
- • Ignoring a slow drip because it seems minor — slow leaks cause the most hidden rot damage over time.
- • Re-caulking a rusted pan instead of addressing the corrosion.
Related Problems: AC Dripping Water
- YELLOW — Inspection RecommendedAC Water LeaksWhy Is My AC Leaking Water?Read this next if broad water-leak diagnosis with no location specified yet — the visitor needs to identify the source before anything else.View answer
- YELLOW — Inspection RecommendedAC Water LeaksWhy Is My AC Vent Dripping Water?Read this next if water appearing at supply registers and grilles — a duct insulation, humidity and airflow issue rather than a condensate drain issue.View answer
- YELLOW — Inspection RecommendedAC Water LeaksWhy Is My AC Unit Leaking Water?Read this next if water is visibly originating at the equipment cabinet — indoor air handler or outdoor condenser — rather than appearing elsewhere in the home.View answer
- YELLOW — Inspection RecommendedAC Water LeaksWhy Is My AC Leaking Water Inside?Read this next if water is appearing indoors and the visitor is concerned about interior damage — emphasis on containment and stopping the water.View answer
- YELLOW — Inspection RecommendedAC Water LeaksWhy Is My AC Leaking?Read this next if leak type is unidentified — the visitor has not established whether it is water, refrigerant or oil, so the page must help classify the leak.View answer
- YELLOW — Inspection RecommendedAC Water LeaksWhy Is My AC Leaking Water From the Bottom?Read this next if water is emerging specifically at the base of the unit — drain pan, cabinet base and overflow path are the focus.View answer
- All AC Water Leaks problemsBrowse category
Frequently Asked Questions About an AC Dripping Water
Guidance this page draws on
- HVAC manufacturer service literature — Drain trap and pan slope installation requirements.
- U.S. Department of Energy — Guidance on insulating refrigerant lines to prevent condensation.