
Why Is My AC Leaking Water From the Bottom?
Causes, safe checks and when to call a professional
Expert Answer: AC Leaking Water From the Bottom
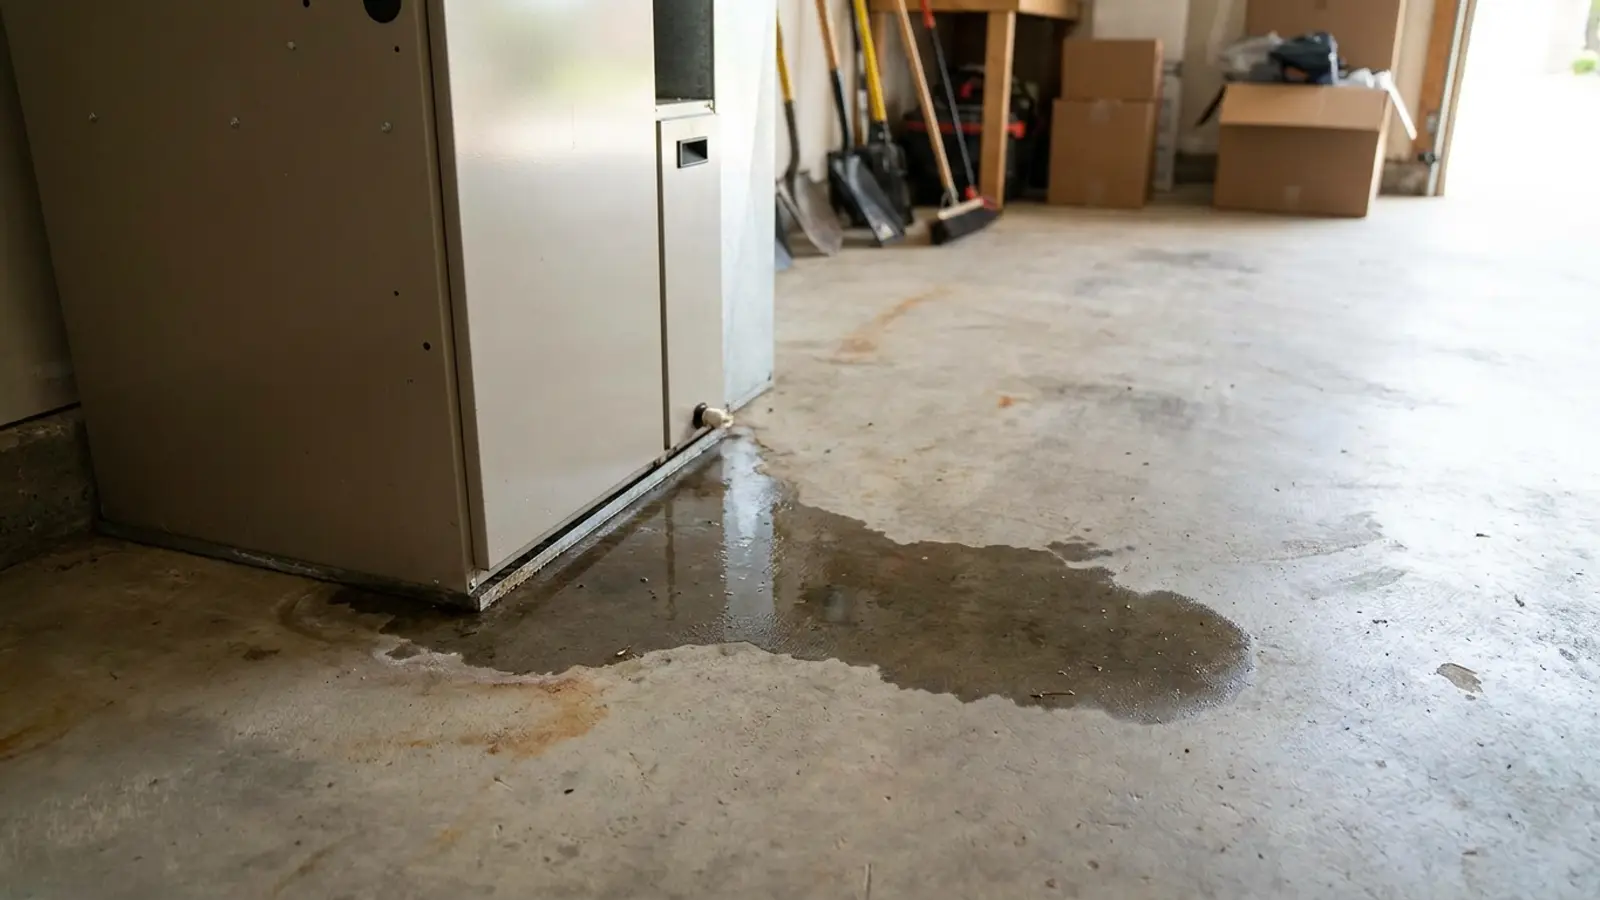
Water emerging at the base of the cabinet almost always means the drain pan is not doing its job. Either it is overflowing because the drain line is blocked, it is corroded or cracked so water escapes underneath, the drain fitting has loosened, or the pan is out of level so water pools at the wrong end. Less often, the cabinet insulation is saturated and wicking water to the base. Check the pan for standing water first — full pan means blocked drain, empty pan with water below means the pan itself has failed.
Check these 3 things first
- 1Look directly underneath the cabinet base for the exact point water is escaping.
- 2Check whether the unit is sitting level or tilted away from the drain.
- 3Inspect the drain pan and its seals for cracks or gaps at the base.
How Serious Is This?
GREEN
Usually Manageable
Often resolved with basic homeowner checks and routine maintenance.
YELLOW — this issue's severity level
Inspection Recommended(this issue)
Worth a professional diagnosis soon to avoid a larger repair.
RED
Potentially Serious
Stop using the system and get professional help right away.
Most Likely Causes of an AC Leaking Water From the Bottom
1. Blocked drain line causing pan overflow
Water rises past the pan rim and runs down the cabinet to the floor.
2. Rusted or cracked drain pan
Older galvanized pans corrode at the seams. Water exits below the pan even when the drain works.
3. Loose or disconnected drain fitting
The connection at the pan works loose and drips into the cabinet base.
4. Pan out of level
Settling or improper installation leaves water standing at the opposite end from the drain, where it eventually spills.
5. Missing trap causing improper drainage
Without a correct trap, blower pressure can hold water in the pan instead of letting it drain.
6. Saturated cabinet insulation
Wet liner insulation holds and releases water at the cabinet base over time.
Safe Homeowner Checks for an AC Leaking Water From the Bottom
- Look into the drain pan: standing water or dry?
- Check the drain line outlet outdoors for flow.
- Inspect the drain fitting at the pan for looseness or drips.
- Look for rust streaks or corrosion at the pan seams.
- Check whether the pan appears level.
- Shut cooling off if water is reaching finished flooring.
Stop and get help if you notice
- • Rust flakes and corrosion visible in the pan.
- • Water tracking along the cabinet base to electrical components.
- • Persistent damp subfloor or platform under the unit.
2-Minute Tests for an AC Leaking Water From the Bottom
Each test isolates one specific cause so you know what you are dealing with before anyone quotes you a repair. Stop immediately if anything feels unsafe.
Check the unit and pan for level
About 10 minutesTools: Small level
Tests for: Pan out of level
- Place a small level on top of the indoor unit cabinet or the visible pan lip.
- Check both side-to-side and front-to-back level.
- Note which direction the unit tilts, if any.
- Check whether the low corner corresponds to where water is escaping.
- Normal result
- The unit and pan sit level in both directions.
- Problem result
- A visible tilt exists, and the low point matches the leak location.
What it means: A tilted pan lets water pool and spill at the lowest corner instead of reaching the drain.
Confirm overflow versus a base seal leak
About 10 minutesTools: Flashlight
Tests for: Blocked drain line causing pan overflow
- Open the access panel and check the pan's water depth.
- Run the system briefly and watch whether the pan level keeps climbing.
- Check the outdoor drain outlet for any discharge at all.
- Compare the timing of the bottom leak to when the pan appears full.
- Normal result
- The pan stays shallow and drains steadily outdoors.
- Problem result
- The pan fills and the bottom leak starts once it reaches near the top.
What it means: A leak that starts only once the pan is full points to overflow from a blocked drain, not a seal failure.
Inspect where the drain line connects to the pan
About 10 minutesTools: Flashlight
Tests for: Loose or disconnected drain fitting
- Locate where the drain line attaches to the bottom of the pan.
- Check that the fitting is fully seated and glued or clamped.
- Look for water tracking along the fitting rather than through the pipe.
- Gently check for any looseness by hand, without forcing it.
- Normal result
- The fitting is tight, sealed, and dry around the joint.
- Problem result
- Water tracks visibly along a loose or gapped fitting.
What it means: A disconnected fitting sends condensate straight out the cabinet bottom instead of down the drain.
Examine the pan floor for corrosion at the base
About 10 minutesTools: Flashlight
Tests for: Rusted or cracked drain pan
- Look at the pan floor closely, especially at seams and low points.
- Check for rust flaking or a soft, thin-feeling spot.
- Note whether the leak location on the cabinet exterior lines up with a suspect spot inside.
- Check underneath the cabinet for a corresponding water stain trail.
- Normal result
- The pan floor is solid with no corrosion visible.
- Problem result
- A rust hole or crack is visible at or near the leak's exterior location.
What it means: A corroded pan floor leaks straight through the cabinet base regardless of drain condition.
What Fixing an AC Leaking Water From the Bottom Typically Costs
Re-level unit/shimming
- DIY
- $0-$20
- Professional
- $100-$250
- Typical time
- 1 hour
Drain line clearing
- DIY
- $5-$15
- Professional
- $75-$200
- Typical time
- 30-60 minutes
Drain fitting reseal/reconnect
- DIY
- Not recommended
- Professional
- $75-$200
- Typical time
- 30-60 minutes
Drain pan replacement
- DIY
- Not a DIY repair
- Professional
- $300-$800
- Typical time
- 2-4 hours
Cabinet base insulation replacement
- DIY
- $20-$50
- Professional
- $100-$300
- Typical time
- 1-2 hours
| Problem | DIY cost | Professional cost | Typical time |
|---|---|---|---|
| Re-level unit/shimming | $0-$20 | $100-$250 | 1 hour |
| Drain line clearing | $5-$15 | $75-$200 | 30-60 minutes |
| Drain fitting reseal/reconnect | Not recommended | $75-$200 | 30-60 minutes |
| Drain pan replacement | Not a DIY repair | $300-$800 | 2-4 hours |
| Cabinet base insulation replacement | $20-$50 | $100-$300 | 1-2 hours |
Ranges are national estimates for planning only. Local labor rates, equipment access and parts availability change what you will actually be quoted.
Working Through an AC Leaking Water From the Bottom
Is there standing water in the pan?
Yes: The drain path is blocked. Have the line cleared.
No: Continue.
Is the pan dry but water is still at the cabinet base?
Yes: Suspect a cracked or rusted pan or a loose fitting.
No: Continue.
Does water only appear during long run cycles?
Yes: Likely a slow drain or a marginal pan slope rather than a full blockage.
No: Have the pan and drain inspected.
What the technician will check
- Pan condition, level and slope.
- Drain line clearing and trap correction.
- Fitting integrity at the pan connection.
- Cabinet insulation condition.
- Float switch verification.
Repair considerations
- • Replacing a primary drain pan often requires pulling the evaporator coil, which is labor intensive.
- • A secondary pan under the unit can be installed as protection where replacement is deferred.
- • On very old air handlers, extensive pan corrosion is a data point toward equipment replacement.
What this actually means
The bottom of the cabinet is the collection point for every water problem inside the unit, so the location tells you the water has already escaped normal drainage. Distinguishing overflow (water over the pan rim) from leakage (water through or under the pan) determines whether you need a drain cleared or a pan replaced.
When to Call an HVAC Professional About an AC Leaking Water From the Bottom
- The pan is corroded or cracked.
- The drain will not clear.
- Water is reaching the platform, subfloor or electrical parts.
- The pan appears to be out of level.
Preventing an AC Leaking Water From the Bottom From Coming Back
- • Flush the drain annually.
- • Ask for a pan inspection during maintenance on units older than about 10 years.
- • Ensure the unit sits level on a solid platform.
Worth doing yourself
- • Check and correct the unit's level with shims if it is a floor- or platform-mounted air handler.
- • Clear the drain line to rule out overflow before assuming a seal has failed.
- • Dry and inspect saturated cabinet insulation for mold risk.
- • Photograph the exact drip point at the base for your technician.
Do not waste money on
- • Caulking the cabinet base as a fix without identifying whether it is overflow or a seal failure.
- • Assuming a slight tilt is harmless — even small tilts redirect water away from the drain.
Related Problems: AC Leaking Water From the Bottom
- YELLOW — Inspection RecommendedAC Water LeaksWhy Is My AC Unit Leaking Water?Read this next if water is visibly originating at the equipment cabinet — indoor air handler or outdoor condenser — rather than appearing elsewhere in the home.View answer
- YELLOW — Inspection RecommendedAC Water LeaksWhy Is My AC Leaking Water?Read this next if broad water-leak diagnosis with no location specified yet — the visitor needs to identify the source before anything else.View answer
- YELLOW — Inspection RecommendedAC Water LeaksWhy Is My AC Leaking Water Inside?Read this next if water is appearing indoors and the visitor is concerned about interior damage — emphasis on containment and stopping the water.View answer
- YELLOW — Inspection RecommendedAC Water LeaksWhy Is My AC Dripping Water?Read this next if active, ongoing dripping observed in real time — emphasis on the drip location and whether that specific drip is normal.View answer
- YELLOW — Inspection RecommendedAC Water LeaksWhy Is My AC Leaking?Read this next if leak type is unidentified — the visitor has not established whether it is water, refrigerant or oil, so the page must help classify the leak.View answer
- YELLOW — Inspection RecommendedAC FreezingWhy Is My AC Unit Freezing Up?Read this next if ice located on the physical unit — indoor cabinet or outdoor condenser and line set — with emphasis on where the ice appears and what each location means.View answer
- All AC Water Leaks problemsBrowse category
Frequently Asked Questions About an AC Leaking Water From the Bottom
Guidance this page draws on
- HVAC manufacturer service literature — Pan slope and mounting-level installation tolerances.
- ACCA — Residential installation standards affecting drainage performance.